
Argomenti trattati
Engaging children in outdoor play is crucial for their development, and what better way to do that than with a DIY water table? This project is not only budget-friendly but also encourages creativity and imaginative play. In this guide, we’ll explore how to construct a water table with minimal materials, ensuring that even those with little DIY experience can successfully create one. So, are you ready to dive into the steps needed to craft a delightful water table that will keep your children entertained for hours?
Gathering the Right Materials
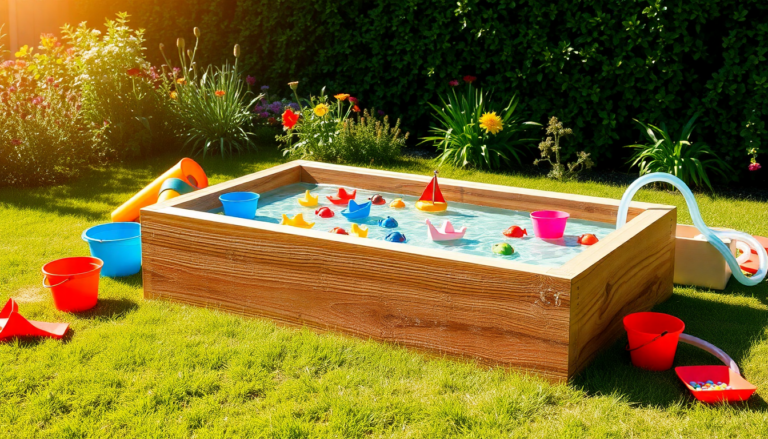
The foundation of this project starts with an IKEA Sockerbit storage box, specifically the 38x51x30 cm variant. It’s the perfect size for holding water or sand, making it a versatile choice. The beauty of this design lies in its simplicity: a wooden frame elevates the box to a comfortable height for taller children, ensuring that playtime is enjoyable without straining their backs. Plus, you can enhance its functionality by adding hooks and shelves from the IKEA Sunnersta line, which allows for easy access to various utensils.
Now, let’s talk budget. The Sockerbit box is priced at about £15, while the wooden planks, made from outdoor-treated timber, will set you back approximately £15.80. To complete your assembly, you’ll need some basic tools like a saw, drill driver, sander, wood glue, and wood screws (60mm), along with two corner brackets for added stability. Sounds doable, right?
Here’s a quick cut list for the wooden planks:
- 2 pieces at 120 cm
- 2 pieces at 80 cm
- 2 pieces at 36.5 cm
- 3 pieces at 52 cm
- 2 pieces at 41 cm
- 2 pieces of bamboo at 51 cm
This straightforward list makes it easy to visualize what you need before starting. The versatility of the water table also allows it to double as a sandbox. You can use the same utensils, adding some sand-specific tools like buckets and rakes for extra fun!
Building Your Water Table Step by Step
Once you’ve gathered your materials, it’s time to roll up your sleeves and get building! Start by constructing the wooden frame, ensuring it’s sturdy and secure. Attach the Sockerbit box at the center of the frame, creating the heart of the play area. Consider installing hooks along the frame’s perimeter for hanging various tools and toys, which helps keep everything organized and tidy.
When it comes to playtime, the possibilities are endless. Your children can immerse themselves in imaginative activities like potion-making, which can include foraging for flowers and mixing petals with water in jam jars. Adding items like collapsible bowls, funnels, and scrapers can elevate their play experience. Why not involve your children in the creative process? Encouraging them to explore different household items can lead to even more engaging play scenarios!
After a fun-filled session, cleanup is a breeze. Simply empty the Sockerbit box and store all utensils inside. Pop the lid back on to keep everything clean and dry for the next adventure. This not only teaches children the importance of tidying up but also prolongs the life of your DIY creation.
Maximizing Playtime with Additional Activities
The water table provides an excellent platform for various activities beyond simple water play. Consider introducing elements like soap, bath fizzers, and baking soda and vinegar to create exciting experiments that can captivate young minds. Encourage your children to think creatively about what they can add to their water table. Items like whisks, wooden spoons, and even small containers can spark new ideas for play. Isn’t that exciting?
This DIY project is more than just creating a play area; it’s about fostering creativity and exploration in children. As you embark on this journey to build your water table, remember to engage your kids in the process. Allowing them to share their ideas and preferences will not only make the project more enjoyable but also create lasting memories together.
With the summer holidays around the corner, this DIY water table is sure to be a hit, providing countless opportunities for fun and interactive learning outdoors. What new ideas will your family come up with to enhance this playtime experience? The adventure awaits!